Here is the ultimate guide of 3D Printing support structures, learn more and eliminate warping in every printing experience!
Due to additive manufacturing nature, 3D Printing forms solid parts layer by layer, but what happens when the previous layer can’t support a new layer of material? 3D Printing support structures are required to hold those layers and avoid warping and collapsing. However, whether to use 3D Printing supports depend on specified 3D Printing technology and part geometries complexity. It is significant to consider support structures before choosing which 3D Printing technology to use. For one major reason is that 3D printed supports have great impact on surface finish of the final part, which may also affect tolerance and mechanical properties. Removing supports is a necessary task and often increase time in post-processing. Therefore, considering 3D Printing supports is essential before getting your project started.
3D Printing is acknowledged as one of the most effective ways to make complex parts, presenting the original design as same as possible. Speaking of complex structures, overhanging structure and bridge structure are common. So, when you slice the 3D models with slicer software, you may find out that some complex structures need extra supports to ensure successful printing. Hence, 3D Printing support structures are the additional parts to support those complex structures. It sounds easy, right? All you need to do is to add supports on slicer. However, you may encounter different kind of issues if you use different 3D Printing technologies, especially FDM, SLA, SLM. Let’s discover which 3D Printing technologies require support structures.

Image Source: AMERALABS
FDM, SLA and metal 3D printing require support structures. We’ll explain why these 3D Printing technologies need supports in some cases.
1. FDM
FDM, also known as fused deposition modeling, extrudes materials from the nozzle and forms a solid surface layer by layer. Each layer is printed based on the previous layer. Normally, there will be overhangs but whether the amount overhangs can support the structures depend on the hardness and stiffness of the printing material. Meaning that how further the overhangs can stick out is decided by how stiffer the printing material is. However, there will one situation that no matter what kind material, it cannot support the weight and angle of the overhang structure, result in warping or collapsing. There is a thumb of rule that you will allow to build an overhang structure as long as the angle is less than 45 degrees. At this point, models can be printed successfully by following this rule. When your model is printed with an overhang beyond 45 degrees without any 3D printing supports, your prints might be ruined.
Besides, an exception exists, that is bridge. A bridge is the stretched short distances between two points of a print, allowing parts to be printed without supports. But please keep in mind that a bridge should be less than 5mm long, otherwise, support structures are required.
2. SLA
Stereolithography (SLA) forms objects with liquid resins by solidify the material by using UV laser light. To ensure that the 3D printed parts are adhered to the print bed and not floating or deformed, SLA almost always uses supports. You may use a number of supports for your parts, making those supports look like ribs. Supports are touching the actual parts at different locations and angles, and mostly they are determined by parts’ shapes, orientations, and weight. How many support structures are calculated by the software – slicer. As SLA is one of the most accurate 3D Printing technologies to make complex and intricate parts with high precision. And those small supports can be removed decently with dedicated post-processing, and will not affect the whole tolerance of your final object.
3. SLM
SLM is one of the major metal 3D Printing technologies that used to make metal parts. It uses high-energy laser to melt a selective zone and bind the material together layer by layer. It is a technology that needs support structures so that it can keep models fixed to the build plate during printing. Besides, if the overhang of your part is greater than 35 degrees, your parts can be printed without supports. However, at some points, you’ll need to consider 3D Printing support structures carefully as they can be a nightmare and cannot remove during post-processing. Because if the supports are located at the long and narrow aeras, it is impossible to reach and remove. However, with proper support structures and post-processing, supports can be removed easily and it won’t affect the precision and overall quality of your final parts
Selective laser sintering (SLS) and multi jet fusion (MJF) are two technologies that require no support structure during the whole printing process. As both technologies fuse and bind the plastic powder layer by layer, they can use powder as support structure. The major difference between SLM is that bot SLS and MJF don’t melt the material, which means the melting temperature is completely different. However, printing hollow part with SLS or MJF is not recommended as it is extremely difficult to clean the internal un-fused powder. Make sure the escaped hole as large as possible when you need this.
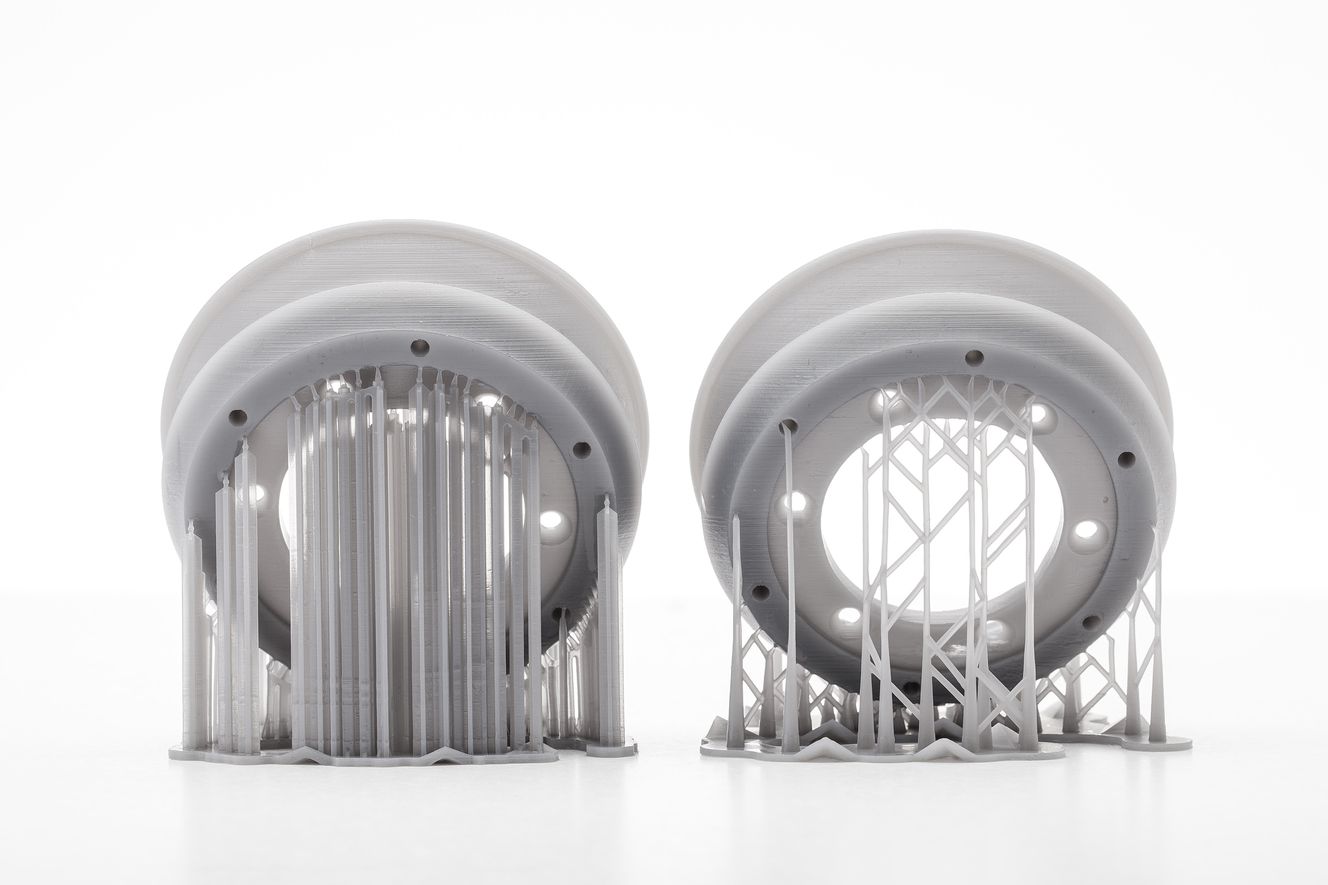
Image Source: Formlabs
Generally, there are two situations that your 3D model needs support structures, overhang and bridge. If your designs contain overhangs or bridges, adding 3D Printing supports to ensure successful printing is necessary.
Overhangs
As mentioned above, not all overhang structures require supports, and we follow the rule of thumb: if the overhang is less than 45 degrees from the vertical, it is feasible to print he overhang without using support structures.
3D printers use tiny horizontal offsets between successive layers. Therefore, a layer will not cover the previous layer perfectly, but instead stacks with a very small offset, allowing the printer to print overhangs that don’t lean too far from vertical. All previous layers can support the next layer if it is below 45 degrees. 45 degrees is considered as the limited.
Take a look at the Y and T figures. The overhang angle of the letter Y is less than 45 degrees with respect to the vertical. You are free to print the letter Y successfully without any 3D printing support structures. Whereas, the letter T consists of an angle of 90 degrees with the vertical. Meaning that you’ll have to use support structures to print it. Or else, you’ll have an unstable T with warping structures.
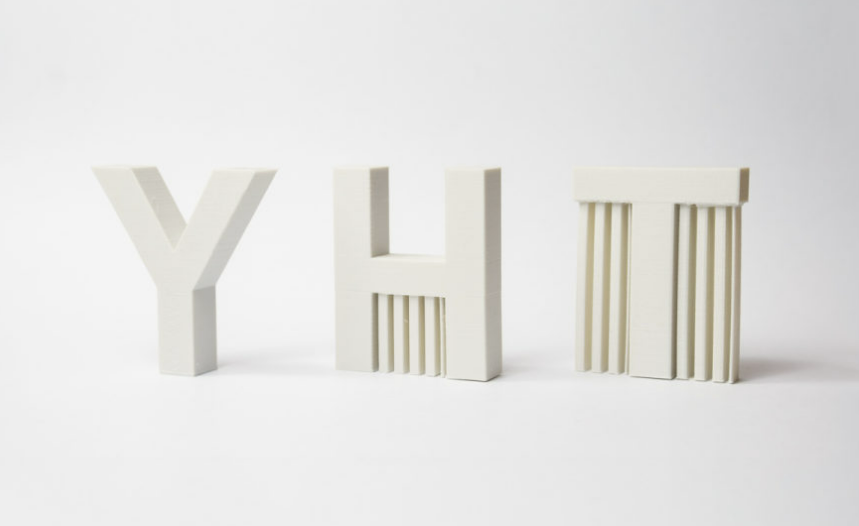
Image Source: 3D Hubs
Bridge
There is another situation that 3D Printing support structures are required when there are bridges. As we’ve discussed what is a bridge in 3D Printing, let’s see more explanation when your 3D design contains bridges. Likewise, not all bridges need supports and the rule of thumb is when the length of a bridge is less than 5 mm, 3D printers can print it without using 3D printing support structures.
Bridging is the technique to build such structures. It stretches the hot material for a short distance and manage to print it with minimal sagging. So, when it comes to the length is further than 5mm, making it not a feasible technique to present the original design. Please remember 45 degrees is just a rule of thumb. Most of the conditions depend on your printer capability and material performance. When printers and materials are not suitable for some cases, you may fail to print overhangs at an angle of above 35 degrees from the vertical. It is wise to consider comprehensive to print both overhang and bridge. Before starting your printing task, if you need to test the overhangs can be printed successfully or not. Test can be done with Massive Overhang Test model from Thingiverse. You are able to identify the maximum angle of the overhangs and not use the printing supports. You can decide which parts need support and which parts don’t.

Image Source: ALL3DP
It is inevitable to use 3D Printing support structures because of design’s geometries, model stability, etc. Creating supports for you part should be a way to optimize the design, not wasting too much materials, and not damage the final part. The methodology of how to create 3D Printing support structures count! And, most of the time slicer software will help you solve the issue of adding and printing supports. So, here are some tips for adding 3D Printing supports with one of the most common and popular slicers – Cura:
1. Select the Suitable Support Geometries
Mainly, the types of support structures have linear (accordion) and tree-like. Linear 3D printing support consists of vertical pillars that touch the overhang completely, which is a versatile method for every overhang and bridge. The downside of using linear support structure is that it’s hard to remove and may damage the surface finish.
Tree-like support only touches the overhang at certain points, which is suitable for non-flat overhangs like nose tip, fingertip, or arches. It is easier to remove but you may pay attention to model stability when using tree-like 3D Printing support structures.
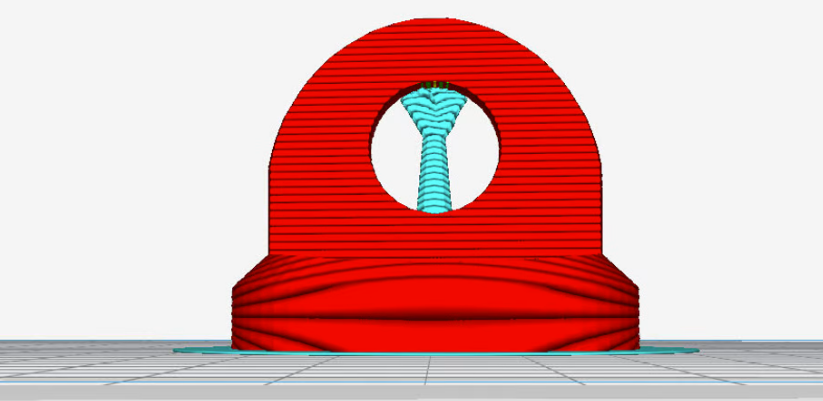
Image Source: ALL3DP
2. Use Auto-generated 3D Printing Support Structures
You may wonder how to find out which part of your design needs additional supports necessarily? Professional 3D Printer slicers like Cura make things easy! Import 3D model into Cura and place it on the virtual build plate, focus on the parts highlighted in red that indicate unstable structures. Those red parts suggest that you may need to add supports underneath them. But if the red part is at the bottom of the model, then you can just skip them as it will touch the build plate during printing. Build plate can support it. To figure out if anywhere of your model still need supports, you can check the Generate Support checkbox under the Support section. And remember choose Layer View so that you can see where are the supports exactly.
3. Decide Placement for the Support Structures
After enabling supports for your model, you can see that there is a Placement setting under the Support section. There are two placement choices, including Everywhere and Touching Build Plate, to position the support structure. Everywhere is the default one in Cura. When you choose Everywhere, the slicer will try to build structures wherever they need supports. It is a versatile and common way for creating support structures in most cases, because it will largely make your design stable. The disadvantage is that Everywhere is not suitable for those complex and intricate parts since the whole part may be surrounded by supports. Therefore, when your part is extremely complicated, please consider using Touching Build Plate for placement.
4. Enhance Surface Roughness Through Enable Support Roof
3D Printing supports are always placed underneath the surface of the overhangs, sacrificing a little bit of surface finish smoothness. The hidden setting Enable Support Roof is helpful. The supporting roof will not affect the surface finish too much as it is a dense skin on the top of the support structures, and you will get better surface quality if utilize it. Why it is a hidden setting is that it is not a common choice, and it is used only if the surface finish of the overhang matters most for your part’s final application. The support structure is way harder to remove if you use Enable Support Roof.
5. Support X/Y Distance Setting
Sometimes, the concern is that the outer wall of support structure can be damaged if the distance between them is built too close. You can use the hidden function - the Support X/Y Distance. In Cura, you can control the minimum distance between the vertical wall and a support structure by the Support X/Y Distance. You can increase the distance to prevent the wall from damages or make the surface smooth. However, if there are no small overhangs sticking out the wall, you should decrease the distance instead of increasing it as the overhangs will lose supports.
6. Z Distance Setting
Z Distance Setting helps remove the 3D Printing support structures easier. You can create less connections between the top and bottom of the support structure. The default setting value is the same as layer height. If you stiff material and the supports are not easy to break away, increase the value based on the layer height. However, Z distance is not suitable for all conditions. For example, 0.2mm Z distance is too much for printing a model with 0.1mm layer height, while 0.1mm Z distance is not enough.
7. Select the Right Pattern
Cura delivers seven patterns to form 3D Printing support structures. To ensure dimensional stability and easy removal on the final part, you should select the right pattern through Support Pattern. There are seven patterns, including Zig Zag, Triangles, Lines, Grid, Concentric, Concentric 3D, and Cross, in which Zig Zag generate the best balance between strength and ease of removal. You can choose it accordingly, based on your supports’ complex geometries, materials, etc.

Image Source: ALL3DP
1. Positioning the Support Structures
It is easy to identify the support structures, and you can break those supports easily. But please be gentle while maneuvering with your fingers and not break the real part of your model.
2. Tools are helpful.
Some parts of the support structures are hard to remove only by your hands. Tools like nose plier, knife, or a scraper are helpful. And you can combine all these tools to remove the hard and stiff part. You can also heat the model or the blade to remove the supports smoothly. Please remember ‘don’t play with knife or fire’!
3. Use Sandpaper
You may still find that there are tiny supports sticking out of the surface after using the above ways to clean and remove. Sand paper is what you need! We recommend we sanding with high grit sandpapers ranging from 220 to 1200 for support structures removal. Besides, it can polish the surface finish of your model. Applying water and sanding the part simultaneously until you have the desired surface quality.
4. Dissolve is the extra option.
Some printers have two extruders, meaning that you can use different material to print the model and the support structures. Using water-soluble material or Limonene soluble material to print supports. And after printing, all you need to do is to immerse the model in water or Limonene. It is an ideal solution for making complex parts.
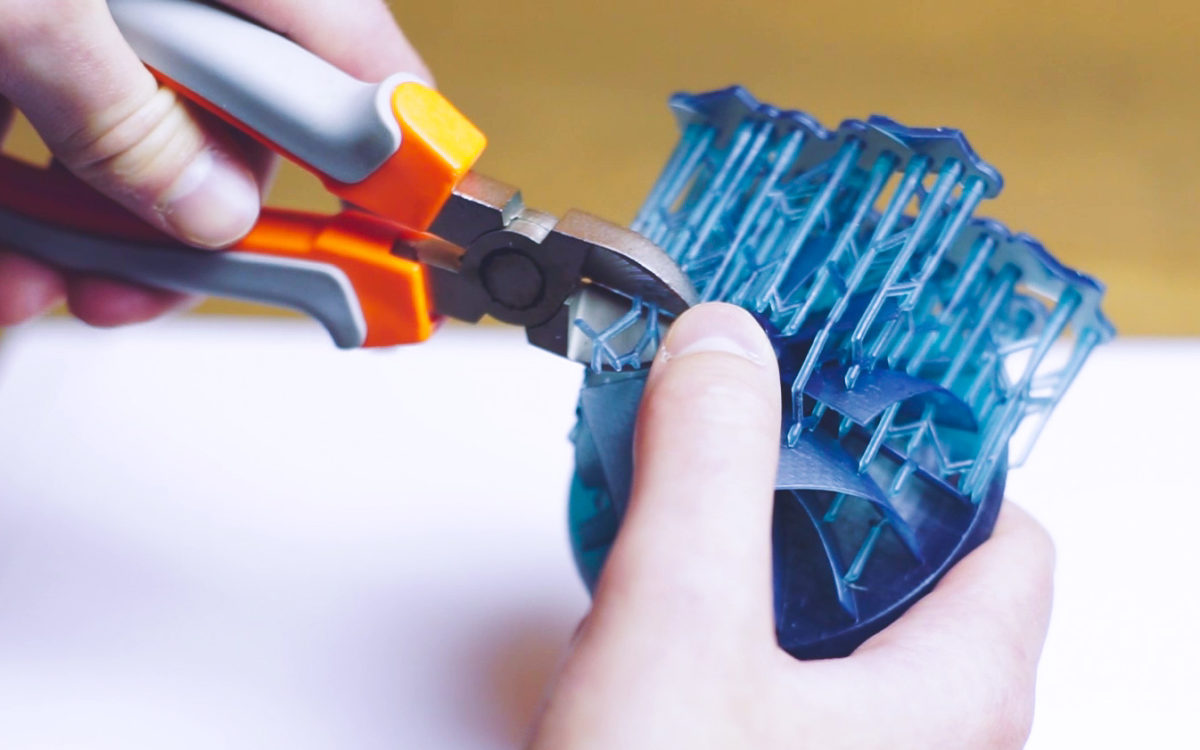
Image Source: 3D Hubs
1. Increased Printing Time
By adding support structures, your printer will need more time to fulfill the task. Time duration depends on how many support structures and how high the supports you used on your model.
2. Increased Material Cost
You need to consider cost of each part because 3D Printing support structures increase cost of per part. Supports are additional material cost of each model. So, please make sure you’re not going to waste materials on the support structures and optimize the whole model structures effectively.
3. Need Extra Post-processing
When the part is finished, those support structures are not useful any more, you need to remove them step by step. More works need to be done in the post-processing procedures.
4. Risk of Damages
As the support structures tend to touch and connect to the walls, and it’s the only method to support overhangs and bridges. To avoid damages on the surface finish, you need to be careful while removing supports on the walls. And pay attention to those hard-to-remove parts, it may break the model if you don’t deal with them gently and slowly.
Please feel free to try instant quoting on our website or email hello@wenext.com if you are interested.
Wenext launches an LCD printing materials application feature, interpreting the unique properties of diverse high-performance printing materials to provide reference for customers in material selection and application for LCD printing.
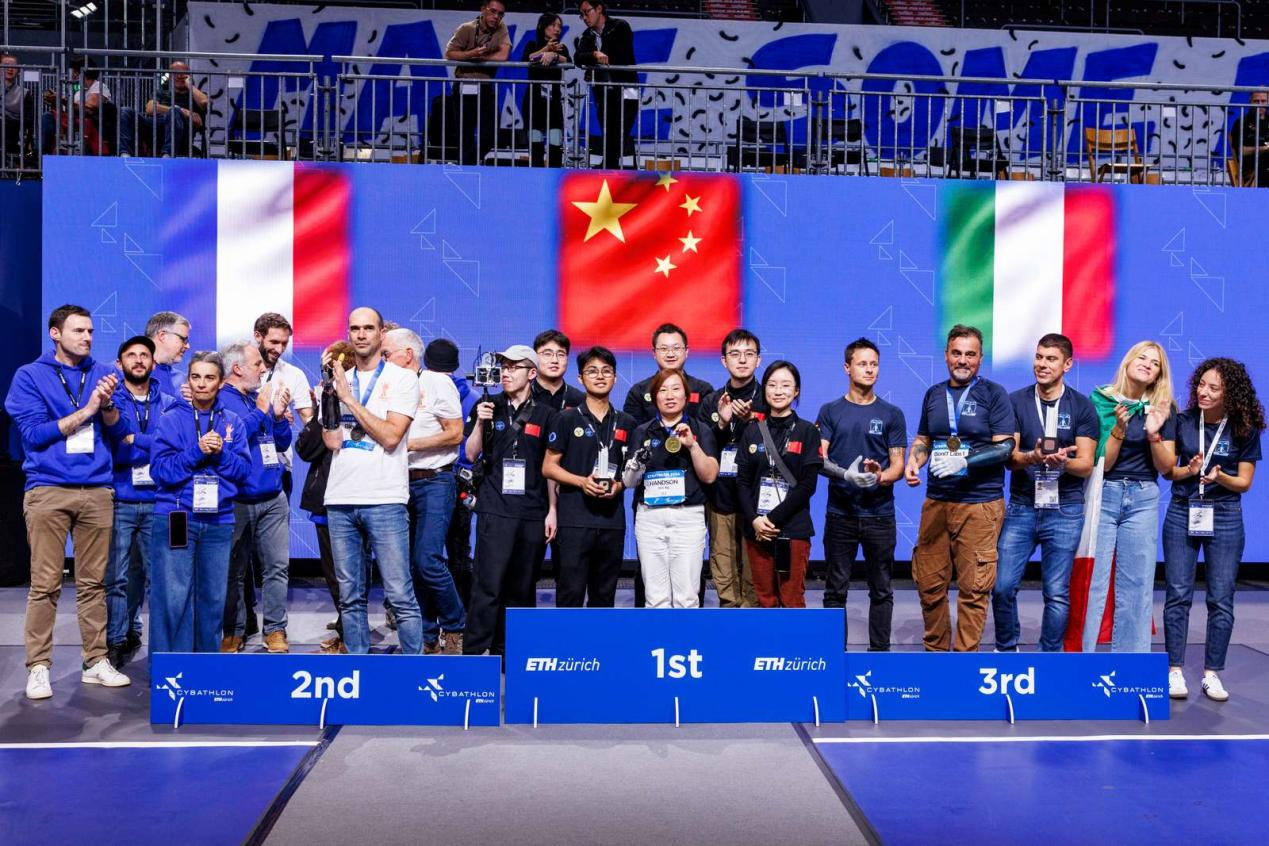
WeNext collaborated with LiYi Bionics, utilizing 3D printing technology as the core manufacturing method, to pioneer a new paradigm for the development and mass production of mechanical bionic hands.
WeNext systematically elaborates on the relevant performance characteristics of Future PA11Pro, shares the material's application in 3D printing, and compares its performance differences with PA12 material, providing a reference for printing material selection and development applications.

WeNext's new generation of FDM materials are continuously being launched. Industrial-grade FDM printing production solutions effectively assist manufacturing across various industries in achieving performance breakthroughs and functional integration.
Wenext launches an LCD printing materials application feature, interpreting the unique properties of diverse high-performance printing materials to provide reference for customers in material selection and application for LCD printing.
WeNext collaborated with LiYi Bionics, utilizing 3D printing technology as the core manufacturing method, to pioneer a new paradigm for the development and mass production of mechanical bionic hands.
WeNext systematically elaborates on the relevant performance characteristics of Future PA11Pro, shares the material's application in 3D printing, and compares its performance differences with PA12 material, providing a reference for printing material selection and development applications.
WeNext's new generation of FDM materials are continuously being launched. Industrial-grade FDM printing production solutions effectively assist manufacturing across various industries in achieving performance breakthroughs and functional integration.
How to build a movie camera yourself using 3D printing technology? How to perfectly replicate model car parts? WeNext, the great assistant for maker enthusiasts, tells you the answer!
3D printing has become a key technological pillar for the new energy vehicle industry to achieve lightweighting, intelligence, and sustainable development, bringing fresh competitiveness to the sector's advancement.
3D printing technology is reshaping the landscape of the cultural and creative industries in application scenarios such as customized cultural product creation, film & TV IP derivative development, and game merchandise production.

3D printing technology has become a key force driving the advancement of manufacturing in the aerospace sector.
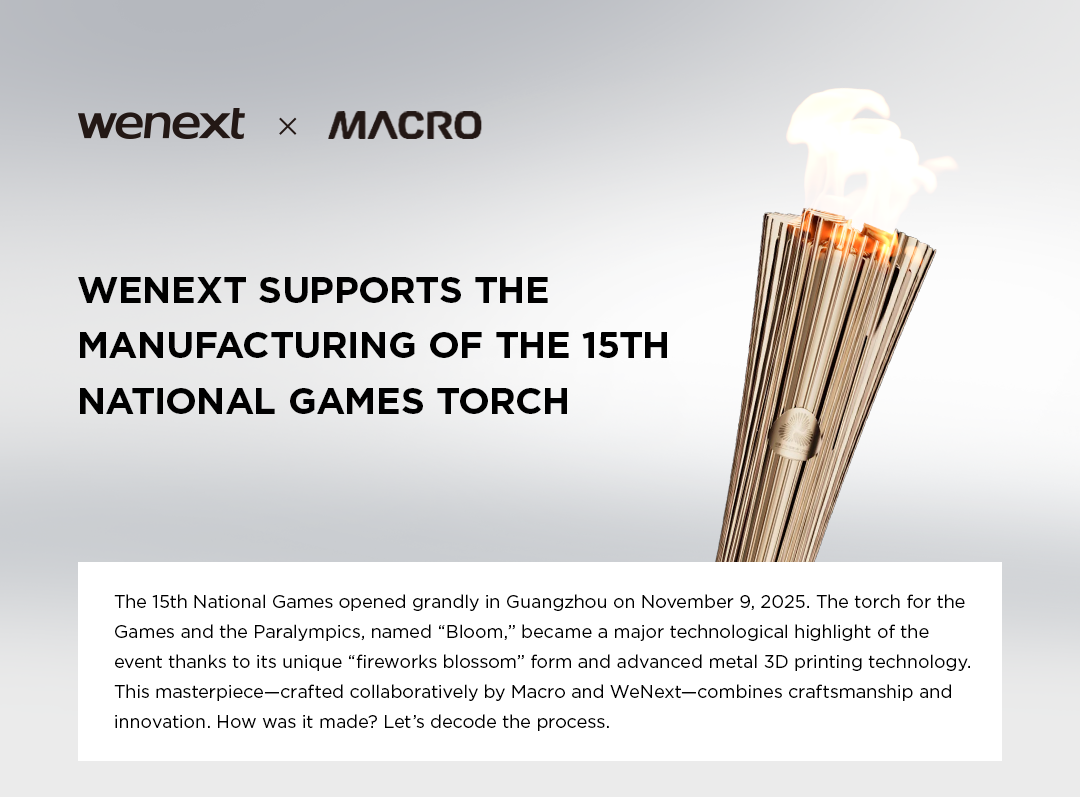
Decoding the manufacturing journey of the “Bloom” torch for the 15th National Games, WeNext broke through the bottlenecks of traditional processes through metal 3D printing technology, transforming Macro’s design concept into reality.
Wenext offers one-stop solutions ranging from rapid prototyping to professional-grade part manufacturing, providing efficient, specialized, and easily accessible manufacturing support for education and scientific research
Wenext launches an LCD printing materials application feature, interpreting the unique properties of diverse high-performance printing materials to provide reference for customers in material selection and application for LCD printing.

Wenext and Liyi Bionics join hands and, with 3D printing technology as the core manufacturing approach, create a completely new paradigm for the research, development, and mass production of mechanical bionic hands.

Stay in Contact:


©2019-2026 Wenext Global Limited All Rights Reserved.
This website uses cookies for better personalized services. By using our websites, you agree to this use. Privacy Policy
We use cookies to improve your experience, check out Privacy Policyy.